Spatial Panner
Position a source anywhere across the whole speaker system by dragging a dot on a mesh, not just left to right.
The Spatial Panner places a source in space across your whole speaker system, not just left-to-right. Instead of one pan control, you position a source on a 2D stage map — a mesh of speaker outputs — and Version T sets the send level to every output to put the sound where you want it. It reads the console’s live sends, so it can also show you where each source currently sits.
This is a good example of role one: the console has the sends, but it has no concept of “put this voice downstage-left across twelve speakers.” Version T adds that control surface on top.
Two modes
The two buttons at the top-right switch the panel between:
- Spatial Panner (the 3D-move icon) — the live view, where you position sources.
- Mesh Organizer (the pencil) — where you build and manage the meshes themselves.
Spatial Panner (live view)
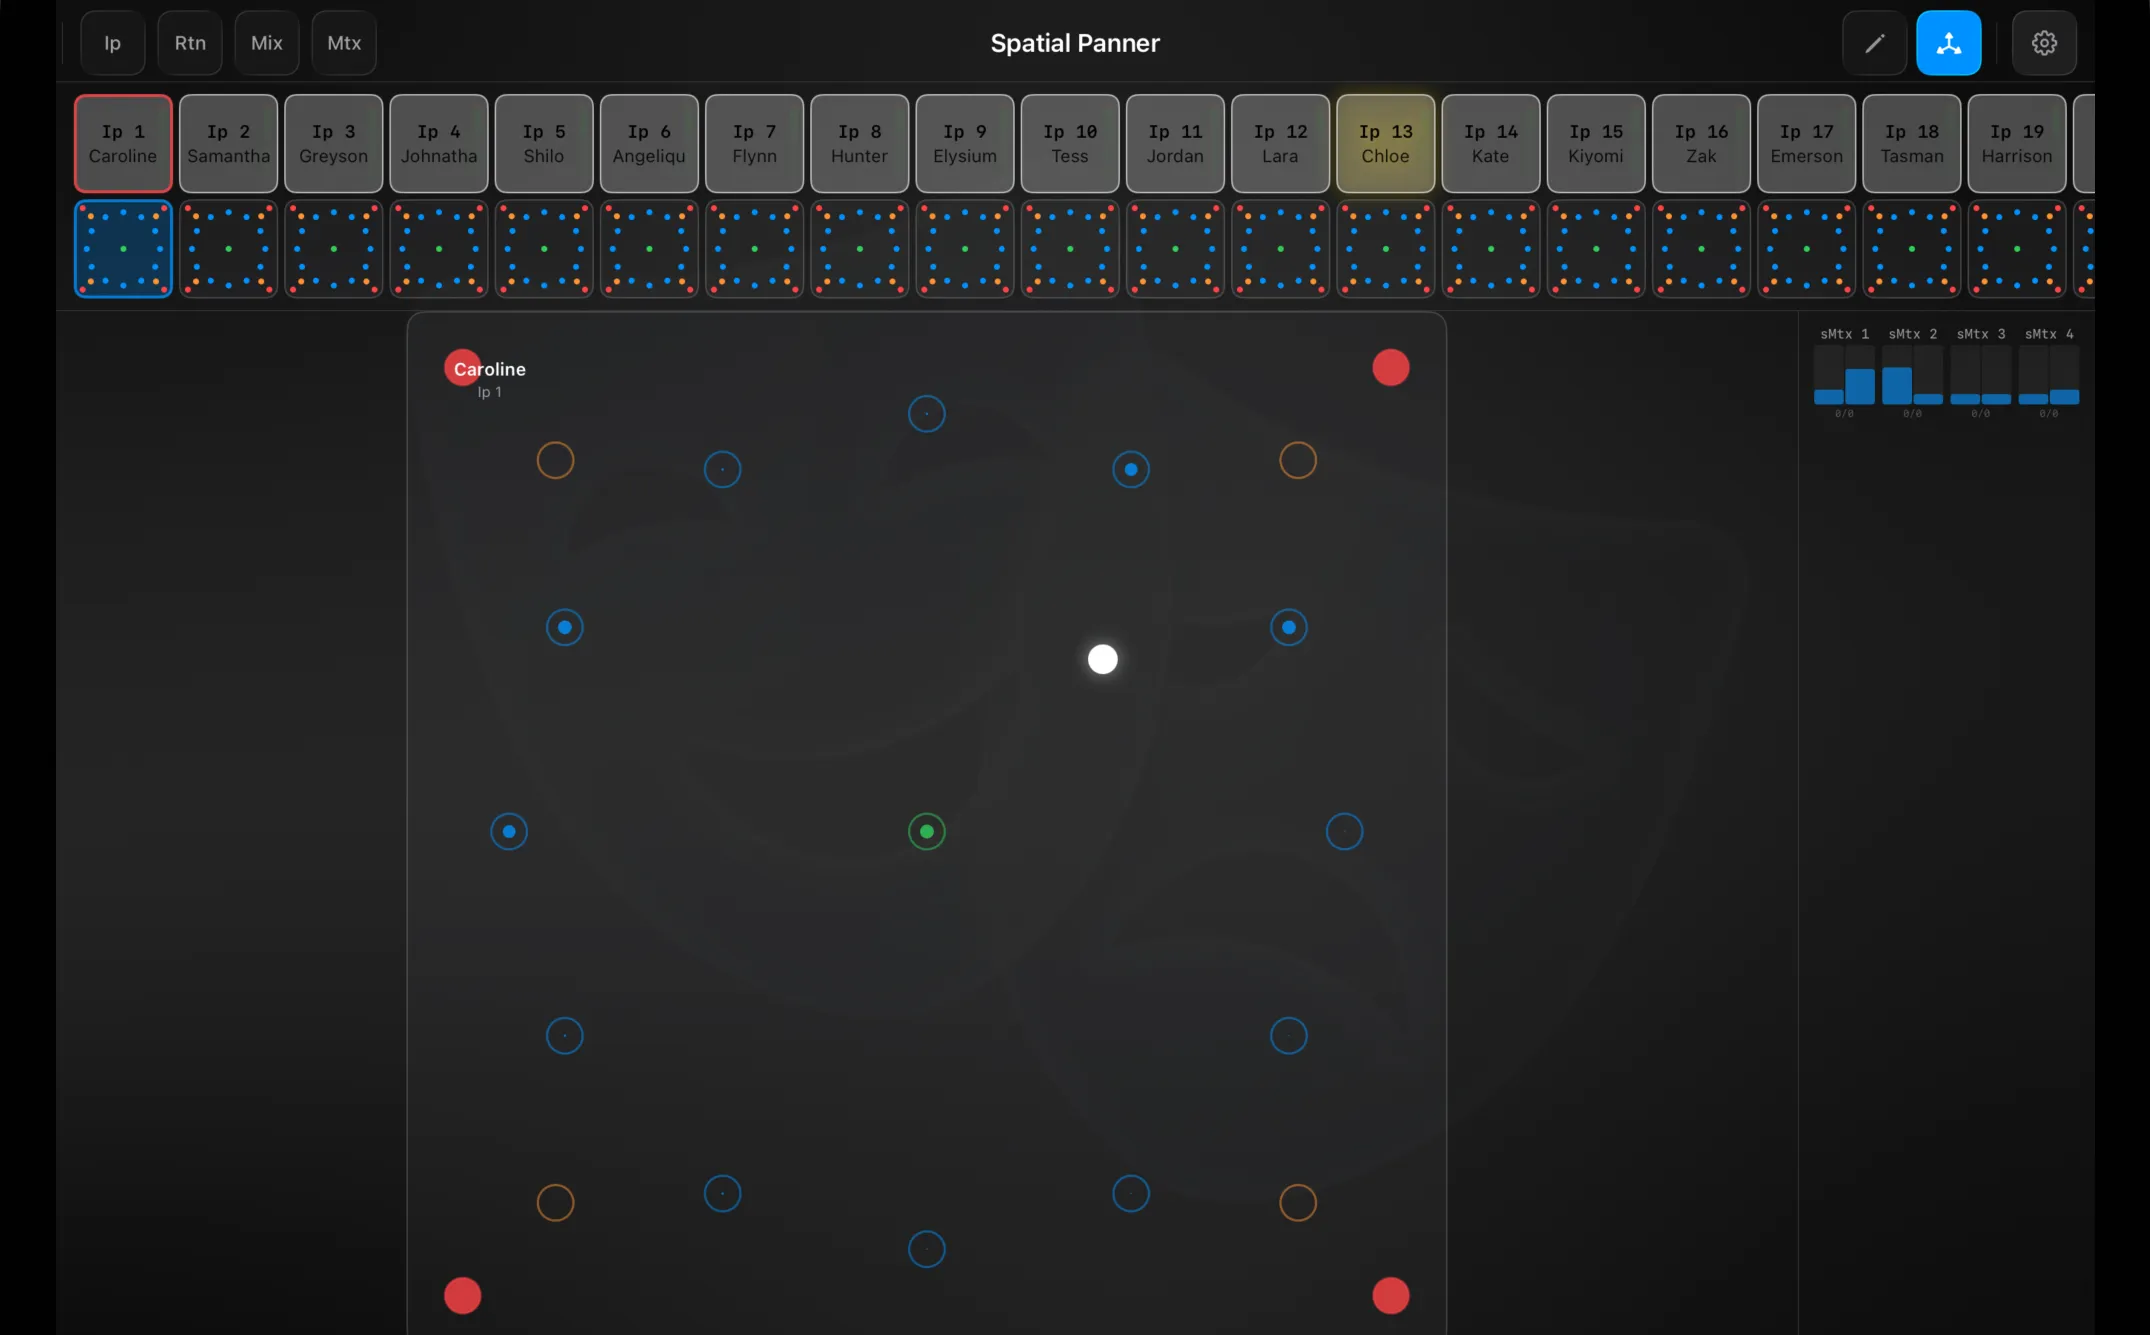
A strip of channels runs along the top, each with a live mini-map showing where that source currently sits. The quick-jump buttons — Ip / Rtn / Mix / Mtx — scroll to inputs, FX returns, mixes (buses on WING) and matrices.
Tap a source to open it on the big stage map. The mesh’s points are drawn as markers — outputs (blue), the centre split (green), mutes (red) and sums (orange) — and the source’s position is the white dot. Drag the dot anywhere on the map to move the source: Version T sets the send to every output to match, and the matrix meters down the right-hand side show the resulting levels live.
Mesh Organizer (edit view)
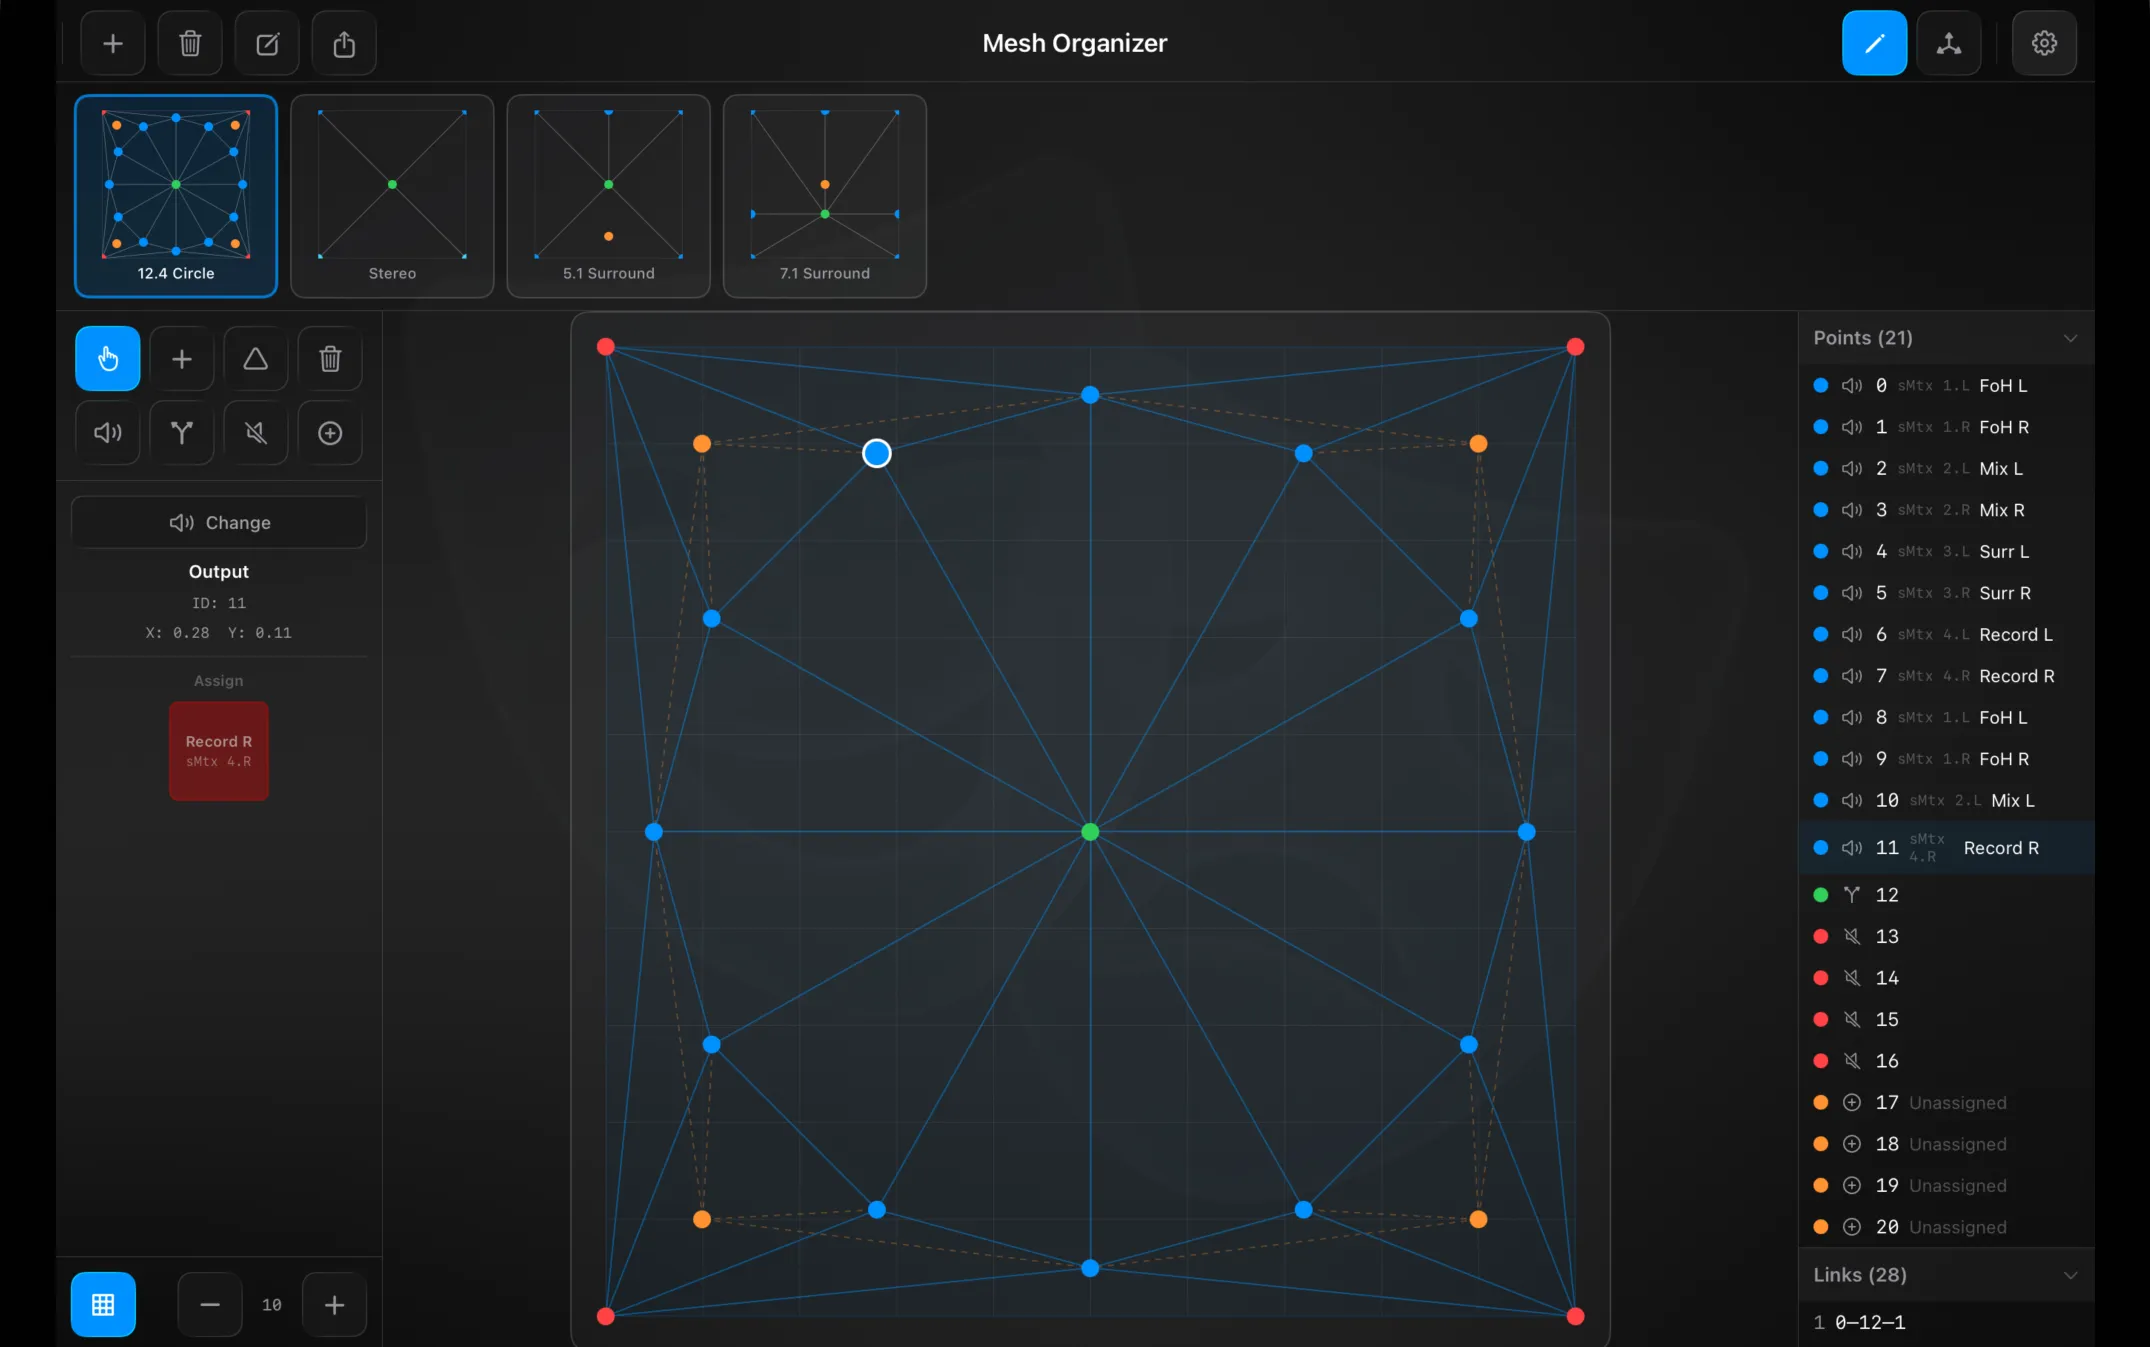
Switch to the pencil to build meshes. Your meshes run along the top as thumbnails — start from a template (Stereo, 5.1 Surround, 7.1 Surround, 12.4 Circle, or Blank), and the header buttons + add, trash, rename and share (copies the mesh to the clipboard as JSON, to paste into another show).
The canvas is your stage. You place points and join them into triangles; the panner interpolates the output gains across those triangles. Each point has a type, chosen from the second row of tools:
| Type | Colour | What it is |
|---|---|---|
| Output | Blue | A speaker / matrix destination — assign it to an output |
| Split | Green | A split point |
| Mute | Red | A mute point — silences the region around it |
| Sum | Orange | A sum point (shows “Unassigned” until you give it an output) |
The tools on the left are select, add, link (tap three points to form a triangle) and delete, with a grid toggle and size control below. Selecting a point shows its ID and X / Y position and its Assign card — tap Change to reassign which output it drives. On the right, Points lists every point with its assignment, and Links lists every triangle.
Preferences
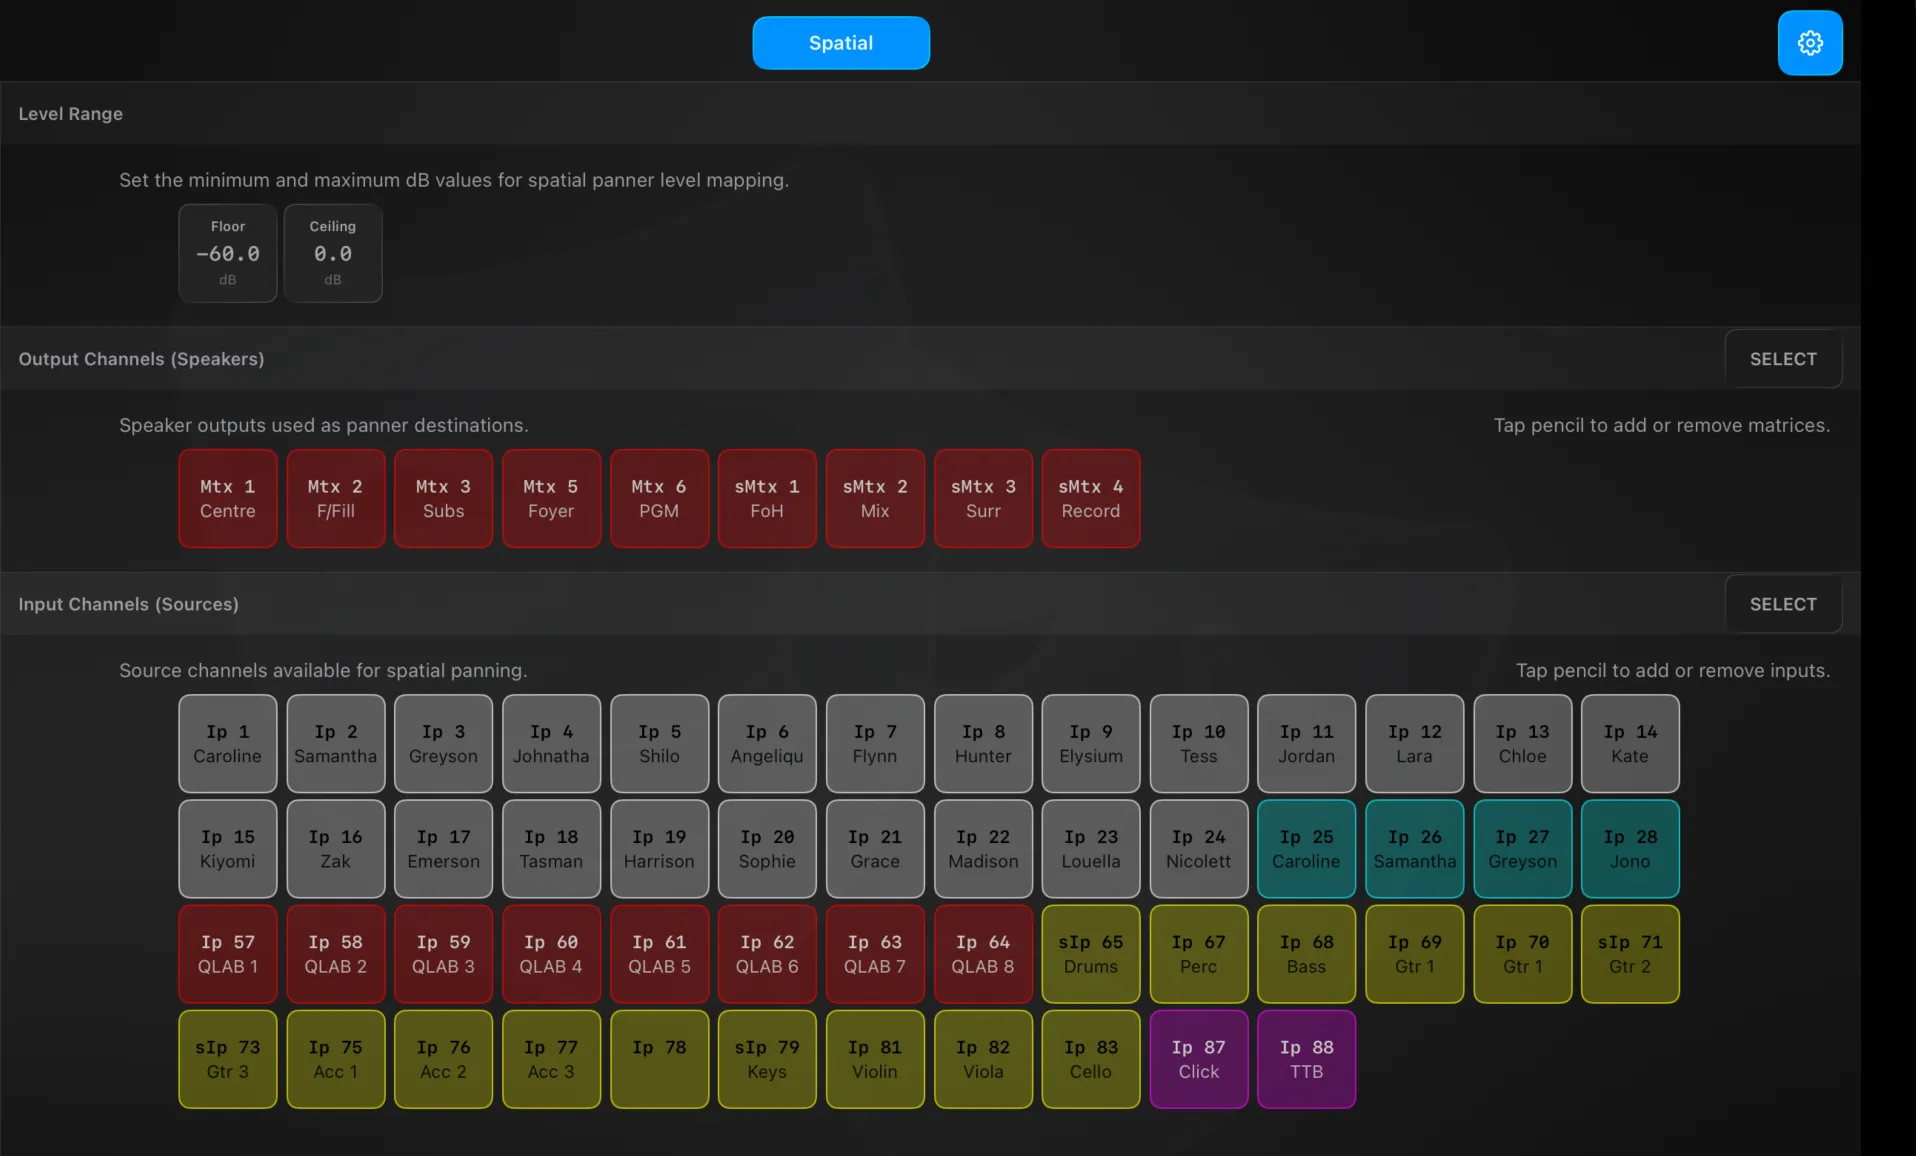
The gear opens Settings → Spatial (a single page):
- Level Range — the Floor and Ceiling dB that positions map onto (drag each). Floor stays at least 10 dB below ceiling; ceiling caps at +10.
- Output Channels (Speakers) — the matrices used as panner destinations. Tap SELECT to add or remove.
- Input Channels (Sources) — the source channels available for panning. Tap SELECT to add or remove.
Technical Reference
PannerPreferences holds the source inputChannels, destination outputChannels, the patchCables, each source’s assigned mesh (meshIndex), and floorDB / ceilingDB. MeshPreferences holds the meshes — each Mesh is a set of points (id, normalized x/y, type, patch) and triangular links. MeshManager resolves a position into per-output weights (resolveWeights) and, in reverse, solves a set of live gains back into an XY position (reversePosition) to draw the dot.